


|
Oscilloscopeclocknixiecrt.com |
 |
| Oscilloscope & Nixie clocks & kits |
| Welcome to the Clocks page ! | |
 |
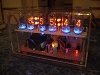
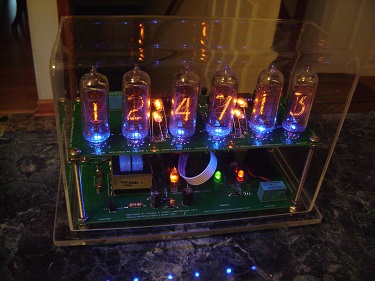
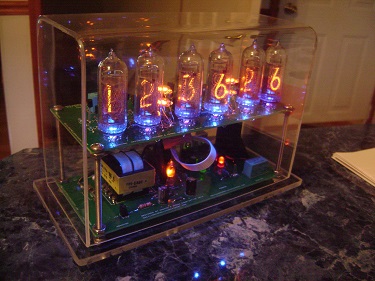
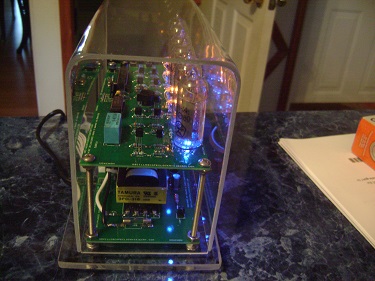
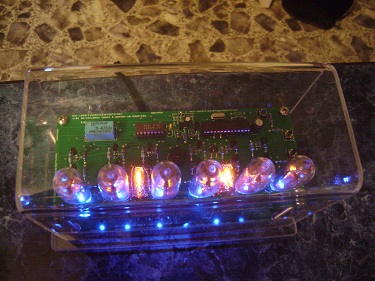
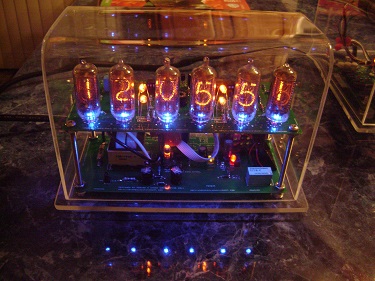
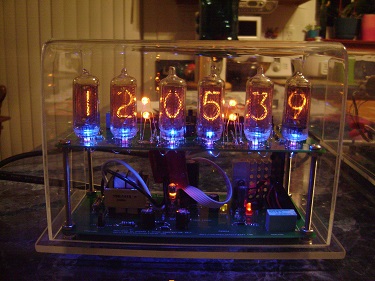
| Below are some different views of the IN14 Nixie clock and a copy of the instructions. | |||
 |
 |
||
|
This clock comes
with
battery backup. A
standard 9 volt
battery makes it easy to replace !
Buy it now for $285 + shipping. |
|||
 |
 |
||
 |
 |
||
| Six digit nixie clock with IN-8-2 nixies with battery backup = $355 + shipping. | |||
|
Instruction set for Nixie clock
Note: if your clock has battery backup,
in order to start from this point you should: 1) unplug the cord 2)unplug the battery 3) plug cord back in 4) plug battery back in When plugged in, the blue led should light immediately and the display will read 11:11:11 for five seconds. To enable gps to auto set the time, press fast set once and the display will change to 33:33:33. To select a time zone, press LED COLOR button and the middle tube will display “1”. Press fast set to cycle through the time zones. When the correct number corresponding to the time zone needed is selected from the list below, press slow set twice to return to setup. The display will change after a few seconds to 00:00:00. To enable the calendar to display, press either fast set or slow set once, and the display will change to 22:22:22 for three seconds. This means the calendar has been enabled. Next the display will read “11:11” while the firmware detects the frequency automatically (60HZ, 50HZ or 1PPS) The tubes should then display 1:11 for three seconds for 60HZ, or 0:00 for 50HZ or 4:44 for 1PPS. If the wrong frequency was erroneously detected, unplug, wait until the blue led goes off, and then plug back in. Next the tubes should display: 12 (12 hour format, the default setting) for three seconds. To choose 24 hour format, press the fast set button once, and the display should be: 24 for three seconds, then display will show 1:00:00 (or 12:00:00 if 12 hr. format) and normal time keeping begins, set buttons operate as fast set / slow set, (hours / minutes). *If the gps auto set is enabled, the date will already be set at this point. To set the calendar date: Press and hold fast set, then press and also hold the led color button (button in the back) at the same time, and the date will fast set. Release the led color button, but hold the fast set, and the date will display until fast set is released. Next hold down slow set & led color to slow set the date. Again, release led color while still holding down slow set and the date will display until slow set is released. The date should appear on the second’s count of 50 to 53. It is in mm/dd/yy format. Please refer to the youtube for illustration: youtube demo To manually turn the display on/off , push the button in the back ( toggle )and hold for no longer than one second until the display toggles. To program the preset on/off times from normal time keeping mode: Press both buttons and the display will blank. Press the fast set button to increment hours to the desired on time ( : 1 after the hour indicates AM , : 0 indicates PM ) .Press slow set to confirm your choice , and the hour you selected will appear with :00 for PM , :11 for AM. To set the alarm for this time, press fast set again, and “1” will be displayed on the last nixie. (xx:xx:x1 ) Please refer to youtube for illustration: alarm demo Press either button once to enter the OFF time set mode. Follow the same procedure, and after the OFF time is confirmed (: XX appears after the hour selected), press slow set button to enter normal timekeeping (fast set, slow set) mode. To program a second set of sleep / wake times, press fast set and repeat the procedure for a second time. Please refer to the youtube link for illustration: 2nd on/off times setup demo Note : The clock will display 12:00 AM to start (1:00 AM if in 24HR mode) so if the present time is after noon, you will need to advance the time past 12:00 in order to reach the PM hours (if in 12 HR mode) else the preset on/off times may be reversed. I.E.: if the present time is 8:00 PM, you need to advance PAST 8:00 once, then stop at 8:00. To change the color of the led underlighting, press the ledcolor button until the color changes. If the button is held, it will cycle through all the color choices until it returns to blue (default color). Time zone 1 ; EST Time zone 2; CST Time zone 3; MST Time zone 4; PST Time zone 5; AKST Time zone 6 ; HAST Time zone 7; BST Time zone 8; CEST Time zone 9; MSK Time zone 10; PHT Thanks again for your purchase ! |
|||
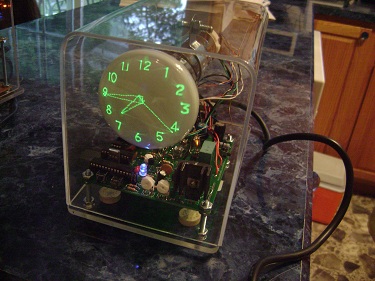
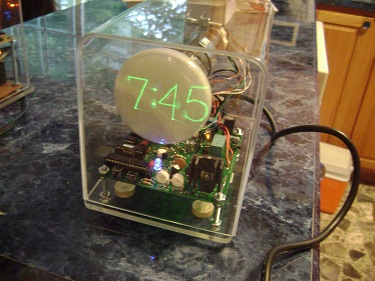
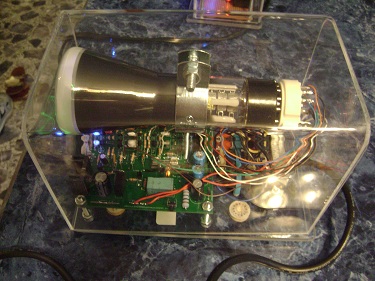
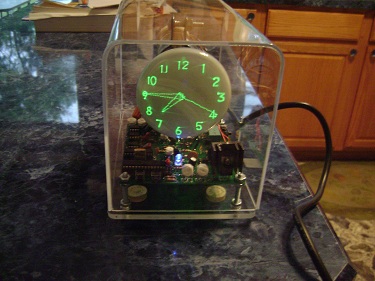
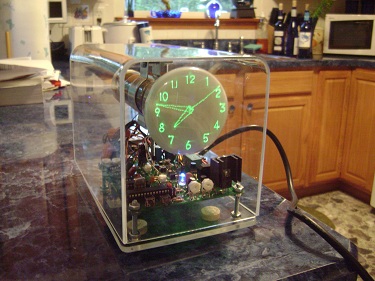
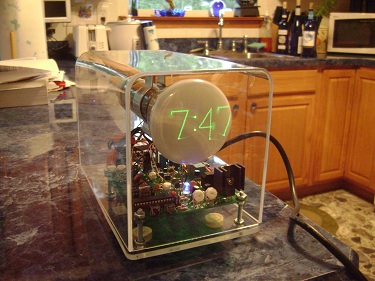
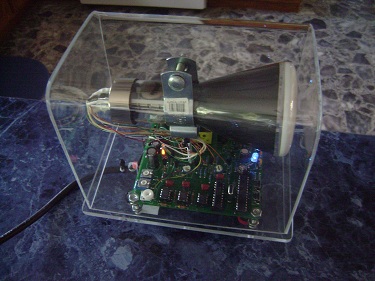
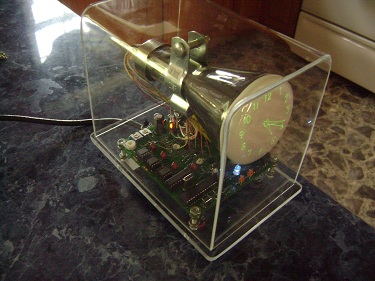
| Below are some different views of the Mini Scope clock and a copy of the instructions. | |||
| The crt shown in these photos is a DG7/32 | |||
|
|
 |
||
 |
 |
||
 |
 |
||
| Instruction set for Scope clock When plugged in, the blue led should light immediately, and there should be a small ‘click’ of the relay engaging. After several minutes, the filament should warm sufficiently and the screen should display ‘1’, (number one) on the right side. This means 60HZ was detected, and set accordingly. If a zero appears instead, then 50HZ was erroneously detected. Unplug, wait until the blue led goes off, and then plug back in. The time set buttons are a pair situated close together, one is fast set, and the other slow set. To set time without programming any preset on/off times , just press the slow set button (on the left) once and the clock face should appear , then use the two buttons on the front to set time . To manually turn the display on/off, press the toggle button (separate from the two set buttons). To program the preset on/off times: Press the fast set & slow set buttons at same time, the screen should display the clock face without hands. Press the fast set button again, and the hours hand should appear .Each time that button is pressed, the hours hand should increment once. When the desired hour is shown for ON time (AM only), Press the slow set button once to confirm, the colons (dots) should appear, this indicates the ON time is set. Press either button once to enter the OFF time set mode. Follow the same procedure , and after the OFF time is confirmed ( colons appear ) , either press slow set to enter normal timekeeping ( fast set , slow set ) mode , or , to set the second set of preset on / off times , press fast set and follow the same procedure , except this time you will be selecting first a PM on time , then an AM off time . Please refer to the youtube link for illustration: on/off times setup demo Note: The clock will display 12:00 AM to start, so if the present time is after noon, you will need to advance the time past 12:00 in order to reach the PM hours, else the preset on/off times may be reversed. I.E.: if the present time is 8:00 PM, you need to advance PAST 8:00 once, and then stop at 8:00. Thanks again for your purchase! | |||
| The crt shown in these photos is a DG7-6 | |||
 |
 |
||